|
Nokia
company relasing 3210 model doesn't suspect that this phone
will be so popular. This cellphone have many users not only
becouse it's small and don't weight too much but also becouse
you may add many features like logo, netmonitor and many others.
On the begining was vibramotor, games activate and now it's
time to change LED lighting in your phone (light emiting
diode). You may use any color like white, green, blurish
green, orange or blue. We think that the last is the best so
we will try to help you in case if you want to change it by
yourself.
Needed equipment:
Torx T6 screwdriver - you may buy full pack in our Store

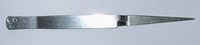
Tweezer
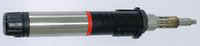
Soldering-iron - recommended with very small tip (11W type).
On the photo you see hot air soldering becouse we use it every
day.
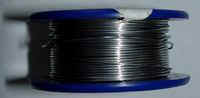
Solder
Pointer - you may use a small pin too. Full pack ot TORX an
pointer may be available in our Store

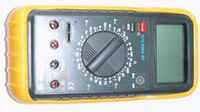
Multimeter
Opening phoen and localising LED's:
Desolder the phoen
first - just click here
to get infromation hot to desolder 5110. If you want to desolder
3210 then information about how to make thi you will fidn in
our 'How to ?' section.
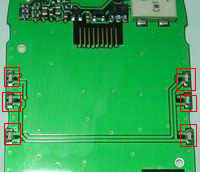
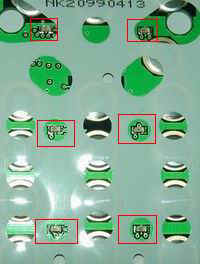
You will now have the PCB (Printed Circuit Board) separate
and you can see the 6 LED's which illuminate the keypad and
6 LED's which illuminate display. (as on pictures shown below)
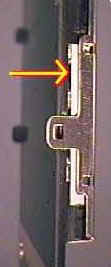
To be able to see the display LED's, you have to remove
the display first. The display is hold onto the PCB by 4 'clips'.
Bend the 'clips' a little bit, first on one side and then you
can easily remove the display.
Here is the PCB layout of the 6150
and 3210. Please notice that the LED's of the 3210 are placed
a little bit 'randomly':
|
Nokia 6150
|
 Nokia 3210 Nokia 3210
|
INFORMATION:
Every LED has got polarization it's means that
if you try to rotate it and solder it will not work. Polarization
is like on picture below:
Now that you have all the info, you can remove the green LED's.
You can choose to do the display first, and when it all works,
do the keypad or vice versa. But you must change 6 LED's altogether!
Don't try to change just 1 LED, this will NOT work.
Desoldering info with soldering-iron
11W:
 |
I heat
one side of the LED with my solder and then I apply a little
bit of pressure with the pin under the LED. |
|
When everything
went ok, one side of the LED will be freed from the PCB |
|
Now you
can take the pair of tweezers, hold the LED and heat the
other side until the entire LED is freed |
Desoldering info with hot air
soldering:
|
Change power of air to
small one |
|
Turn hot air from solderign
to place where LED mounted but be sure that you hold air
soldering directyl upon LED (if you try to change angle
you may ost the LED due air pressure) |
|
In few seconds you may
take twezers and take up LED |
Now you can solder the blue LED onto
the PCB, but watch the polarity! I measure after each new LED
I have soldered if there is no short-circuit between the cathode
and the anode and if all the cathode's and anode's of all the
6 LED's make contact with each other. Well, that's all there
is to it! After changing 6 LED's, put your Nokia back together
and if everything went okay you will have blue lights in your
Nokia.
|